.png "Property Logo")
The post How to Make Homemade Face Masks appeared first on River Oaks Blog.
]]>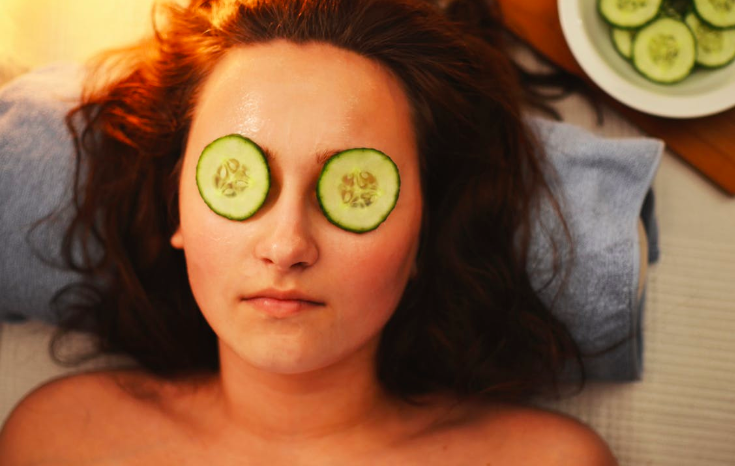 The residents of our Oceanside, CA apartments are busy people, which means they deserve to relax when they have some downtime. A little at-home pampering is great for the body and mind, after all. Fortunately, there are a lot of ingredients you probably already have in your home that can be mixed together to create great face masks. Let's take a look at some awesome options.
1. Banana Face Mask
Bananas are great for the inside of your body, but they do good things for your skin, too. Mash a banana in a bowl until it forms an even paste. Slather it onto your face, and let it sit for 10 to 20 minutes before rinsing it with cold water. If you feel so inclined, you might also want to add a 1/4 cup of plain yogurt and two tablespoons of honey, which is a natural acne fighter.
2. Oatmeal Face Mask
Combine 1/2 cup of hot (not boiling!) water with 1/3 cup of oatmeal. Let the mixture sit for a few minutes, then add the following:
- 2 tablespoons of yogurt (plain)
- 2 tablespoons of honey
- 1 small egg white
Mix everything together, then apply a thin layer to your face. Let it sit for 10 to 20 minutes, then rinse with warm water. Be sure to have a strainer or colander below your face to catch the oatmeal chunks; you don't want to clog your sink.
3. Avocado Face Mask
Avocado is great for stressed-out skin. It's rich in vitamin E, which can help reduce the appearance of fine lines and wrinkles. Avocados also contain a significant amount of omega fatty acids — nutrients that help strengthen the skin barrier, which keeps your cells protected from the elements. To make a mask with this miracle ingredient, combine 1/2 ripe avocado, 1 teaspoon of plain yogurt and 1 teaspoon of honey. Mash the mixture together until it forms a paste, then apply it to your face. If your skin is ultra-dry, you can add a teaspoon or two of virgin olive oil.
Are you searching for an apartment community where you can feel at ease the moment you walk through the door? We'd like to welcome you home to River Oaks. Take a look at our available floor plans today!
The post How to Make Homemade Face Masks appeared first on River Oaks Blog.
]]>The post Kitchen Boa: How to Make This Fun and Useful Kitchen Accessory appeared first on River Oaks Blog.
]]> Do you love to cook? Then you understand the importance of having a kitchen towel at the ready. There are always messes to clean up as well as hands and dishes that need drying. But for some reason, kitchen towels always seem to be just out of reach. And that is why a kitchen boa is such a clever and useful item to own. The best thing about a kitchen boa? They're easy to create.
What Is a Kitchen Boa?
The kitchen boa combines a scarf-like material with two hand towels. It's called a boa because you can toss it around your neck like a feather boa. When you wear a kitchen boa, you will always have a hand towel within reach when you need one.
How to Make a Kitchen Boa
You will need:
- 1 piece of preshrunk cotton fabric, 9 x 21 inches
- 1 kitchen towel
- Coordinating thread
Directions for Sewing a Kitchen Boa:
- For the neckband, sew the 9 x 21-inch cotton fabric into a tube. It should be approximately four inches wide when you're done.
- Cut the kitchen towel in half.
- Hem the sides and the bottoms of the two towel halves.
- Gather the top of each towel half and insert it into the neckband.
- Fold under the raw edges of the neckband.
- Top-stitch the towels in place.
Voila, you now have a kitchen boa.
The Kitchen Boa as a Gift
Kitchen boas make excellent gifts for your friends or family members who love to cook. You can even tailor them for holiday gift-giving. For instance, you can use a bright red or green fabric for the scarf part and Christmas-themed towels to create holiday kitchen boas. You can also make a kitchen boa that doubles as potholders by adding heat-resistant padding to the hand towels.
Just like the kitchen boa, our apartments in Oceanside have both a fun and a practical side. Our beautiful community, for instance, features two pools and two spas, two playgrounds, a fitness center, and private garages. Please call to make an appointment to check out our available floor plans and to see all that River Oaks has to offer you.
The post Kitchen Boa: How to Make This Fun and Useful Kitchen Accessory appeared first on River Oaks Blog.
]]>The post Two Easy Presents to Make for Your Favorite Hockey Fan appeared first on River Oaks Blog.
]]>
Surprise your favorite hockey fan with one of two fun presents that you can create yourself. Both are inexpensive and very simple to make. Plus, these gifts will be extra special since they were handcrafted especially for them by you.
No-Sew Fleece Blanket
You will need:
- 2 pieces fleece fabric (about 2.25 yards each) with a hockey-related design
Directions:
- Lay the piece of fleece that will be the back of the blanket face-down.
- Next, lay the other piece on top of the first piece of fleece face-up.
- Trim both pieces at the same time, so they are the same size. Be aware that the finished blanket will be about 10 inches smaller when complete.
- Cut out one 6-inch square from each corner of both pieces of fleece.
- Create fringe by cutting 6 inches into the fleece at 1-inch intervals around all sides of the blanket.
- Knot the fringe pieces from the bottom and the top pieces together tightly around the entire blanket until all are tied.
No-Sew T-Shirt Pillow
You will need:
- Xl Hockey T-Shirt (Clean)
- 12 x 12 pillow form or fiberfill
Directions:
- Start by cutting off the arms of the T-shirt.
- Get rid of the top of the shirt where the neckline is by cutting straight across.
- Cut the T-shirt into two 12 1/2-inch x 12 1/2-inch squares. Try to place the hockey graphics at the center of the pillow, but if it’s not possible, don’t worry.
- Lay the right sides of the shirt together (so that the shirt is now essentially inside-out).
- Sew three sides of the pillow together, leaving the top open.
- Turn right-side out. Poke out the corners.
- Insert pillow form (you could also just stuff the pillow with fiberfill if you don’t have a pillow form).
- Hand-stitch the opening closed.
Do you enjoy spending as much time as possible soaking in the lovely SoCal sunshine? Then, please come check out our beautiful apartments in Oceanside, California. They boast private patios and balconies where you can soak in the rays while creating these easy crafts. Then, when you’re done, enjoy our pet-friendly community’s two pools, two spas, brand-new fitness facility, and on-site grocery store.
The post Two Easy Presents to Make for Your Favorite Hockey Fan appeared first on River Oaks Blog.
]]>The post Spooky Halloween Meals appeared first on River Oaks Blog.
]]> Halloween is a busy night in most households. People are coming in from work or school and hurrying up to go trick-or-treating, to a Halloween party or to another fun themed event. But before you can do anything, you need to eat dinner. Here are a few Halloween meal ideas that are not only spooky but are fast and easy as well.
Hot Dog Mummies
Hot dog mummies are a festive take on pigs in a blanket. Grab your favorite hot dogs and your favorite ready-to-bake crescent rolls. Open the crescent rolls and slice the dough into thin, mummy-like strips. If desired, roll the hot dog in a thin piece of cheese for added taste. Then begin to place your mummy strips all around the hot dog. Make the strips go in different directions to enhance the mummy look. Bake them in the oven for 13 to 17 minutes, or until the dough is golden brown. You can also add eyes to your mummy using mustard or ketchup.
Spider Pizza
Grab your favorite pre-made or ready-to-make pizza dough. Put some sauce on it, and then add the cheese. The fun part is decorating the pizza. Lay one olive slice on your pizza to create a body, and then cut up another olive into thinner slices to use as the eight legs. Continue to add spiders onto the pizza for a creative and fun treat. And if your family loves meat, consider cutting up pepperoni or ham into the shape of a spiderweb and layering that on the pizza for added effect.
Eyeball Tacos
Make tacos as you normally would. You can use chicken or beef. Then add lettuce, tomatoes, salsa, and cheese. What turns this dish from normal to creepy are the small "eyeballs" you are going to add peering out of the shell. Add two small dollops of sour cream side-by-side at the top of the taco, and then put a sliced olive on each dollop. You now have two eyeballs atop your tacos, for a fun twist on regular tacos.
Spooky is good at Halloween, but it should not be a word you use to describe your current living situation. If you're unhappy with your current residence, you may be looking for apartments in Oceanside, California. Here at River Oaks Apartment Homes, we are proud of our beautiful, well-maintained and safe community. Stop by today to take a tour of our complex.
The post Spooky Halloween Meals appeared first on River Oaks Blog.
]]>